Preprocessing and tomogram reconstruction in Scipion
In this section, we will go through how to reconstruct your tomograms using Scipion, and at the end, how to export the alignment information to pick particles and perform STA in RELION5. If you want to do everything in RELION5, you can click here.
Scipion is a freely available and open-source software that mainly acts as a wrapper for other programs, allowing you to organise your projects and have different software interact almost seamlessly. It can be used for both SPA and tomography, but it is particularly handy for tomography since the field currently lacks a “simple” software that performs all the operations necessary for tomogram reconstruction and STA, while also keeping track of your work.
Here is the example workflow that we are going to follow:
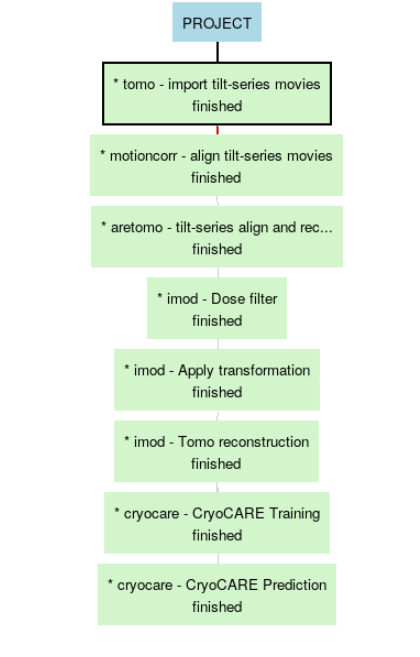
Table of Contents
- Create a new project
- Import frames
- Motion correction
- Cleaning the stack
- Tilt series alignment
- CTF estimation
- Tomogram reconstruction
- Automatic segmentation using MemBrain-seg
- Exporting data to RELION5 for STA
Create a new project
From the base Scipion interface, click on Create Project, give it a name and a location.
From there, you are in your Scipion project, which is empty for now.
Import frames
The first step is to import the frames. You can press Add on the top left or press Ctrl + f to select a protocol. Look for “Add tomo - import tilt-series”.

Here, you need to specify the directory that contains the movies (e.g., .eer) and the .mdoc files that contain the information about each tilt series.
If you are using the downloaded test dataset this would be the gain1_links and gain2_links folders.
Note: We work with Tomo5 mdocs (TFS acquisition software) here, but you might be working with SerialEM mdocs. In any case, Scipion is smart enough to read the info from the mdoc files. However, we recommend overriding these values if you know them! Since they can be wrong in the mdoc file, notably the Tilt axis angle. If you collect your own data on a “classic” Titan G4 with Falcon4i and SelectrisX in
.eer, the tilt axis will probably be the same as here. If you acquired in.tiff, this value might be different. In doubt, ask your facility manager, or check the output of AreTomo (or IMOD), which can estimate the tilt axis angle. A wrong tilt axis angle might result in a wrong-handed tomogram (mirrored), so it’s really important to be sure of that. Check here.
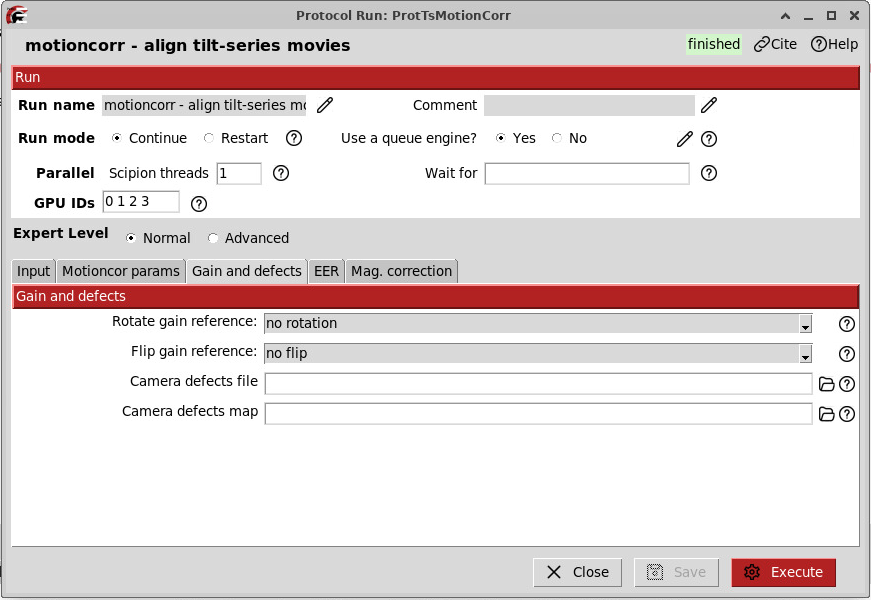
Motion correction
This step aligns each frame of the movies and corrects for beam-induced motion. Frames to align can bet set from 1 to 0 then it will automatically detect the number of frames.
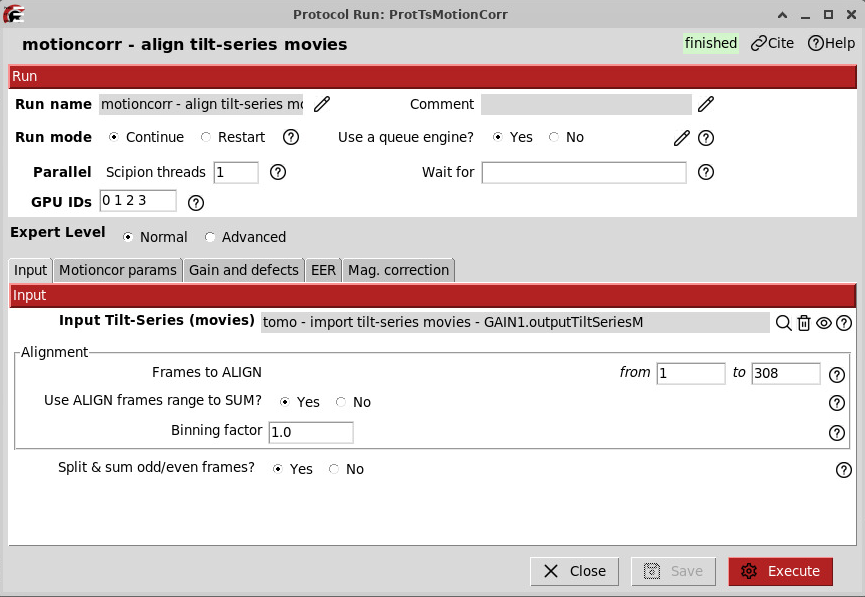
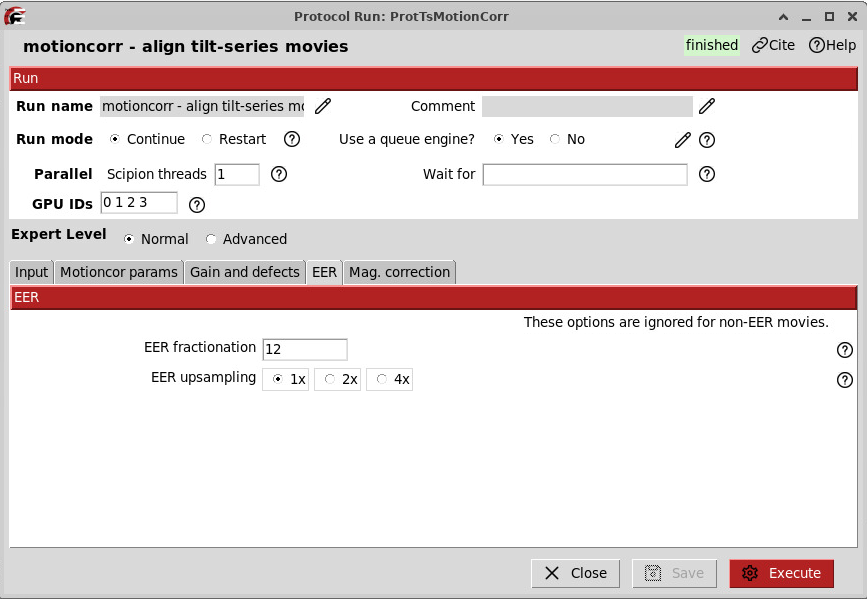
Tick Yes for “Split & sum odd/even frames” if you later want to denoise your tomograms using software like cryoCARE or DeepDeWedge, for example. Denoising is described later in the tutorial.
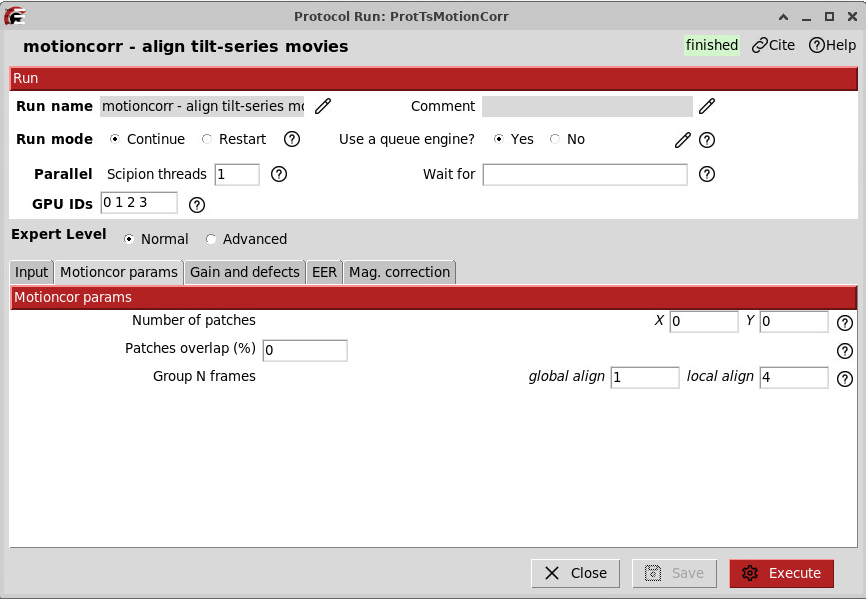
In the “Motioncor params” tab, since we are dealing with really low dose per tilts and frames (as opposed to SPA, where the dose is usually about 10 times higher), we will perform full frame motion correction instead of dividing them into patches.
Because this dataset was collected as .eer, you have the choice to decide how you want to group your frames. It also means you need to specify how you want to group the frames.
To do so, we use this formula:
N_frames = desired_dose_per_group / ( dose_per_tilt * pixel_size² / total_EER_frames )
In general, we want 0.5 as the desired dose per grouped frames.
N_frames = 0.5 / ( 3.5 * 1.91² / 308 ) = 12
…which means, for GainRef1, we are dividing our EER exposure into 308 / 12 = ~ 25 slices
Note that tilts from GainRef1 and GainRef2 have different numbers of frames (on average), so edit that value accordingly!
N_frames = 0.5 / ( 3.5 * 1.91² / 350 ) = 13.7 ~ 14 frames
For .tiff frames this is not necessary/will not be considered, because the frames are already grouped.
Cleaning the stack
Once motion correction is done, you want to remove “bad” tilts from your tilt stack. Bad tilts are tilts that are either:
- Strongly shifted compared to the others (more than 15% of the FOV)
- Partially or fully blacked out
- Blurred because motion correction was not sufficient
In our case, we remove them manually, but be aware that some software offers automated tilt curation based on the result of motion correction and the “darkness-level” of the tilts (for example AreTomo)
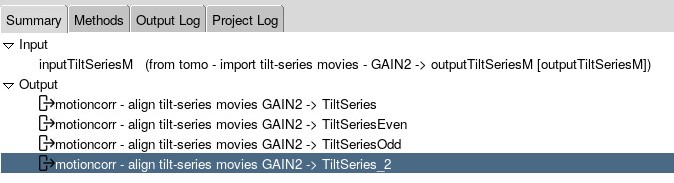
In Scipion, you can open the output TiltSeries created by the motioncorr job by just double-clicking on it.

There, all your tilt series should be displayed. You can expand each tilt series to go through each individual tilt. You can then select tilts to exclude – just hold down space bar to deselect the bad tilts – they will be marked in red. Do this for all the tilt series and then save them.
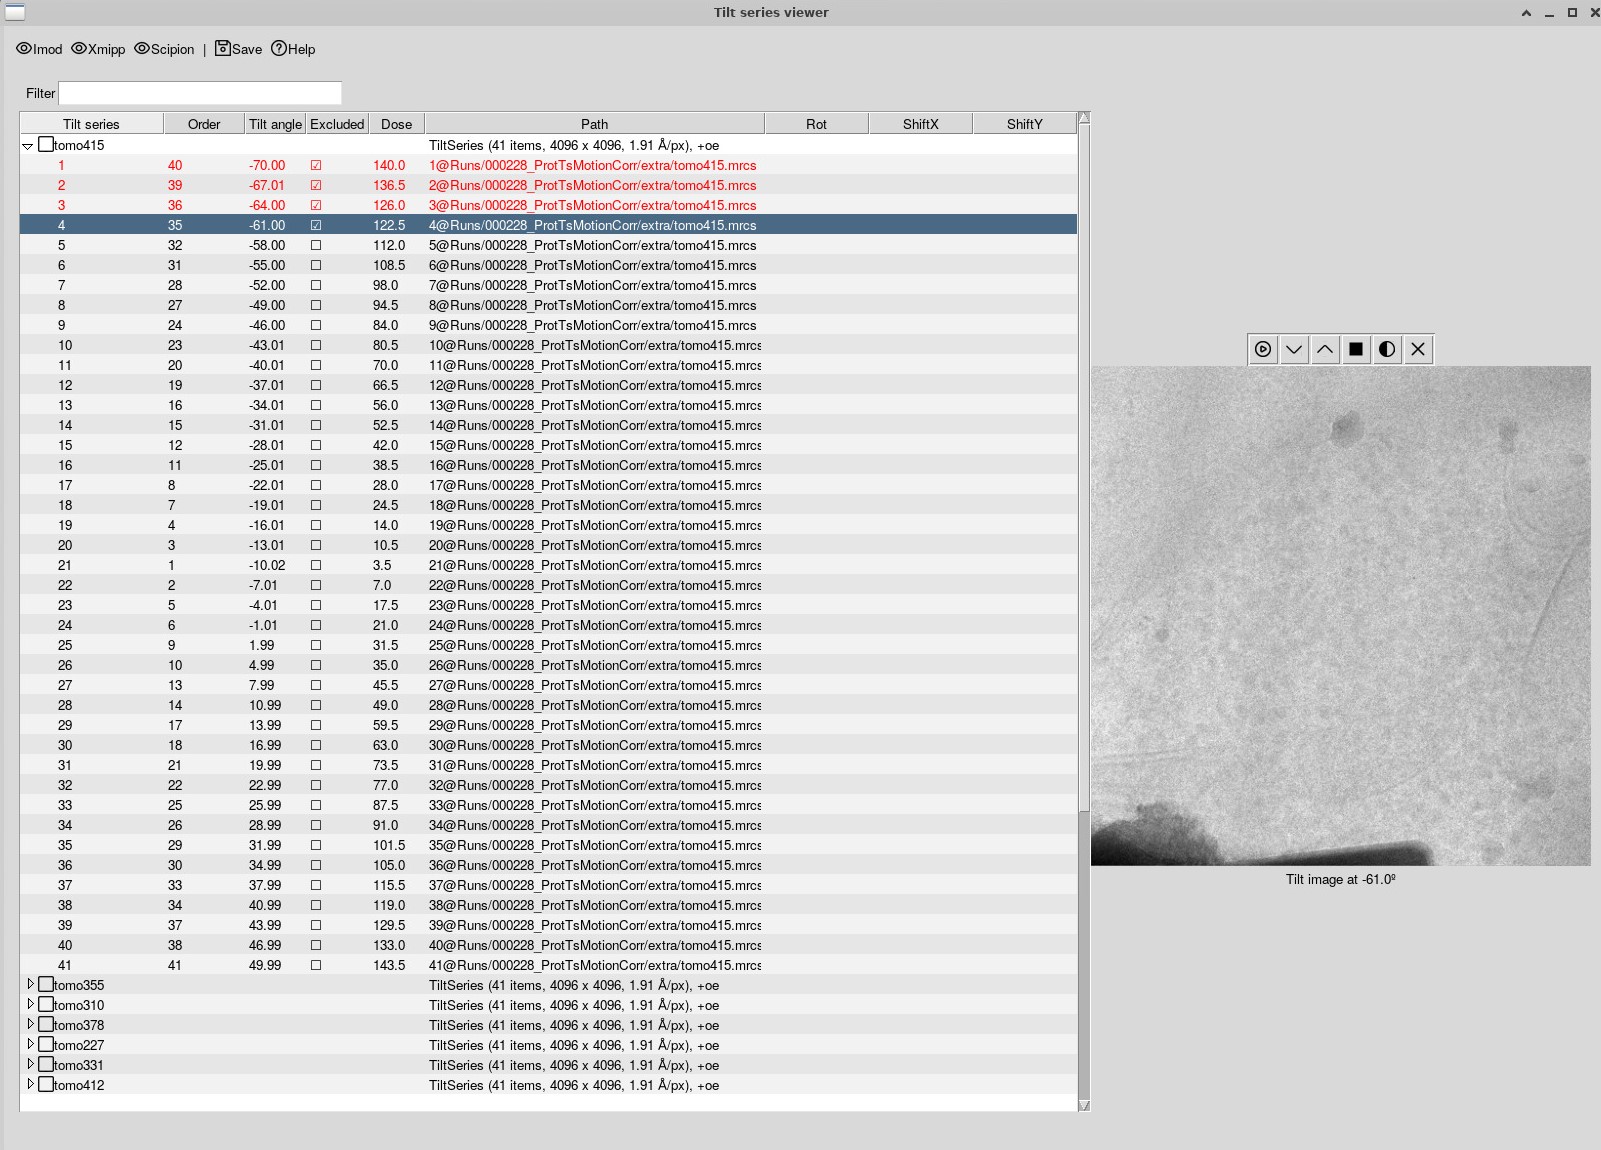
Once you have saved them, a new tilt series should be present.
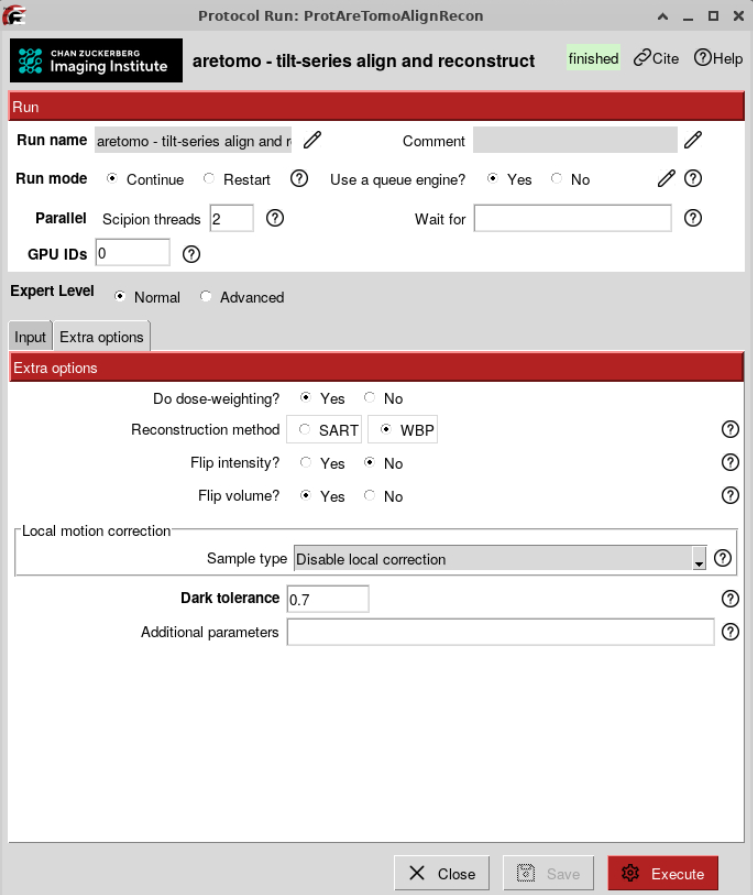
Tilt series alignment
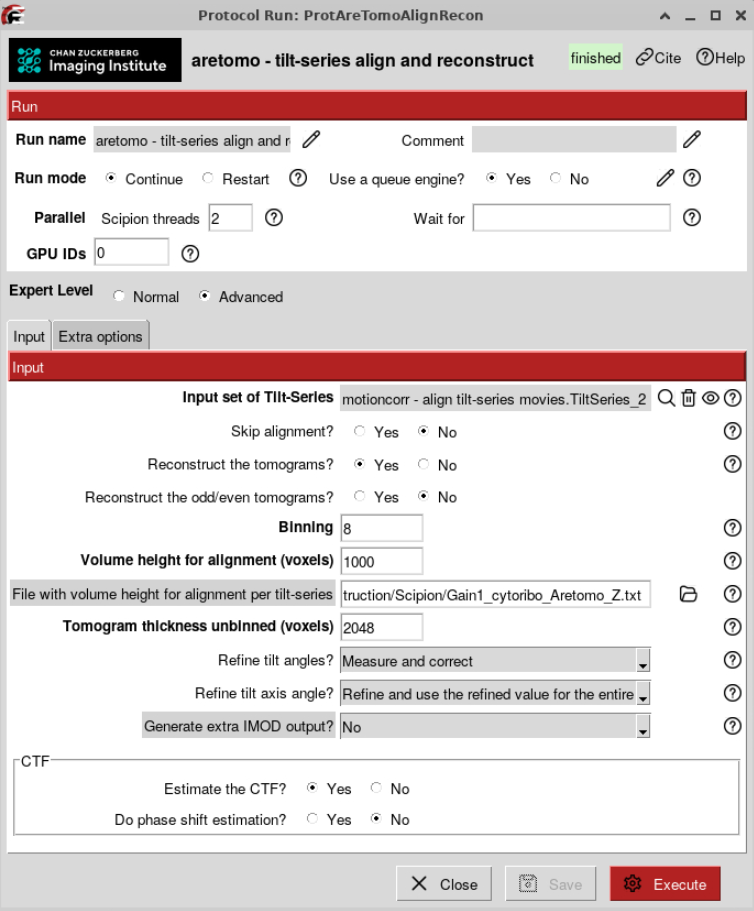
Can be done either with AreTomo or with IMOD patch tracking. Here, we are showing you how to automatically do it with AreTomo.
AreTomo tries to find the optimal back projection scheme based on a theoretical lamella thickness. It also refines the tilt axis angle, starting from the one you provided at import.
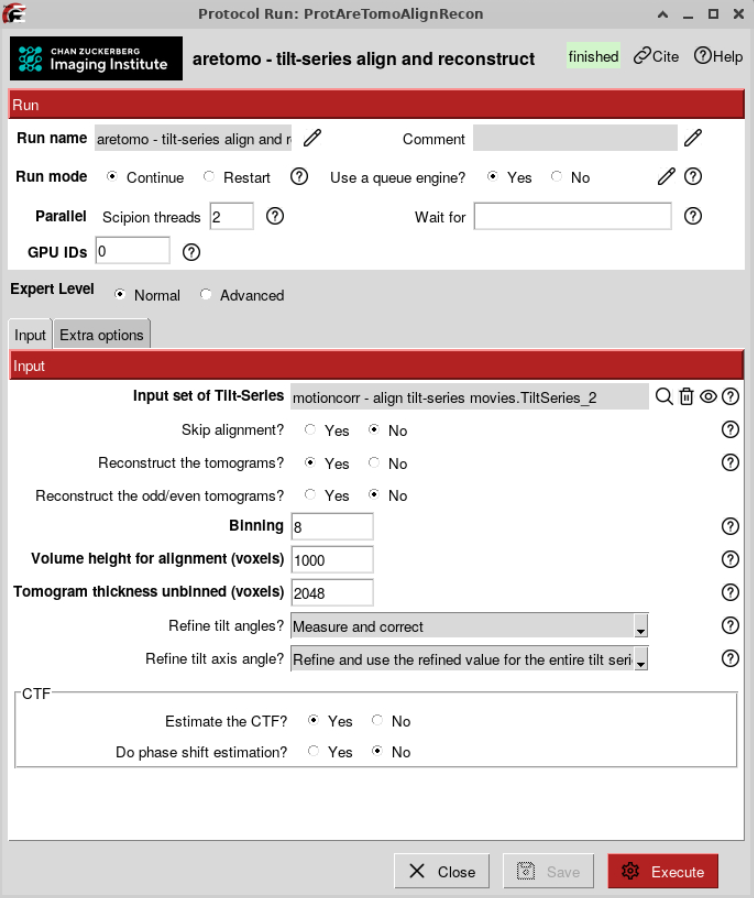
Note: This is where having the correct tilt angle becomes crucial. If you use 95° instead of -95°, AreTomo will reconstruct tomograms with an inverted hand, causing them to be mirrored. Hence, in later steps, such as when performing Subtomogram Averaging (STA), you could end up with mirrored structures. To check whether your tomograms are mirrored, you can run template matching with both properly oriented and inverted-hand templates, link.
We will reconstruct bin8 tomograms first to quickly assess their overall quality and to measure lamella thickness for Z-height refinement. For the initial reconstruction, we will use an estimated lamella thickness of 1000 unbinned pixels (~190 nm).
At this step we will not reconstruct odd/even tomograms for denoising since we are going to do it at a later stage.
Refining AreTomo tilt series alignment
This step is optional but highly recommended if you want well-aligned tomograms. The better the tomogram alignment, the easier it will be to detect your target of interest, and the better resolution you can achieve in subsequent analyses. If you follow the Tutorial using Gain1 or Gain2 from the Chlamy dataset you can download the measured tomogram thickness files here. If not you can refine tilt series alignment by measuring the tomogram thickness as follows:
- Open the bin8 tomograms that resulted from your first AreTomo run.
- Go to Edit > Image > Flip/Rotate.
- Measure the lamella thickness:
- Place the yellow cross on one lamella edge by left-clicking (or right or middle)
- Move your cursor to the opposite edge of the lamella (DON’T CLICK).
- Press Q to get the distance between the yellow cross and the position of your cursor.
The distance will appear in the dialogue box. Here 106 pixels (this is actually a bin4 tomogram shown here) or 81 nm.
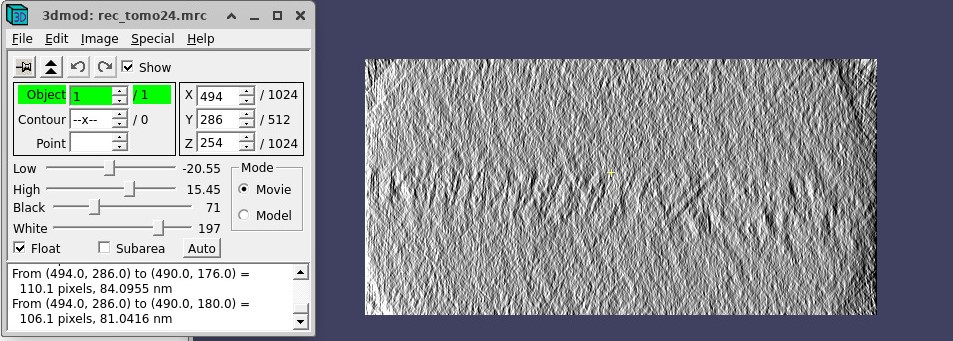
For the Aretomo file, we need to provide the distance in unbinned pixels. So 106 bin4 pixels would be 424 unbinned pixels (or 810 Å / 1.91 Å/pixels = 424 unbinned pixels).
Once you have done that for all the tomograms, you can provide this file as an input for the AreTomo job in the Advanced options (example files here).
CTF estimation
To estimate CTF, you have different options. However, you might have noticed that AreTomo can do it, and if you ran the previous job exactly as we did, you already have done it. We found that CTFFIND4, that was an alternative that we were using, was not performing as well as AreTomo. CTFFIND5 appears to be performing better than CTFFIND4, so we recommand using this one if you don’t want to use AreTomo. You can check the CTF estimate by opening the AreTomo CTF output. Your CTF values should not deviate much over the entire tilt series except for the bad tilts. Take care of the Y-axis scaling! This can be missleading.
Tomogram reconstruction
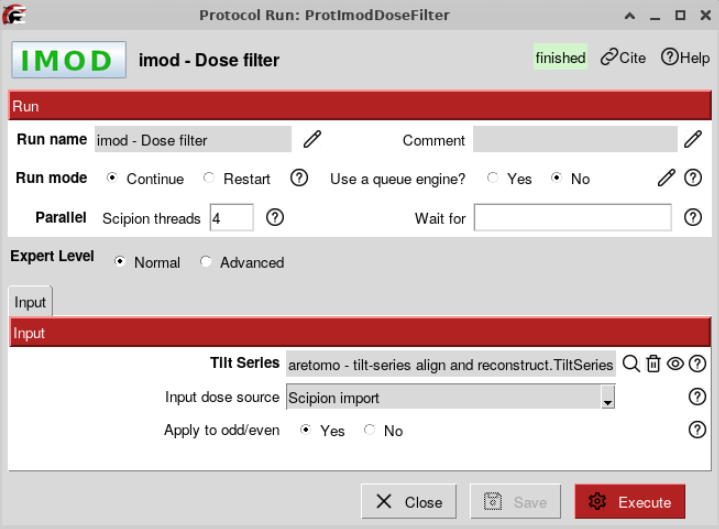
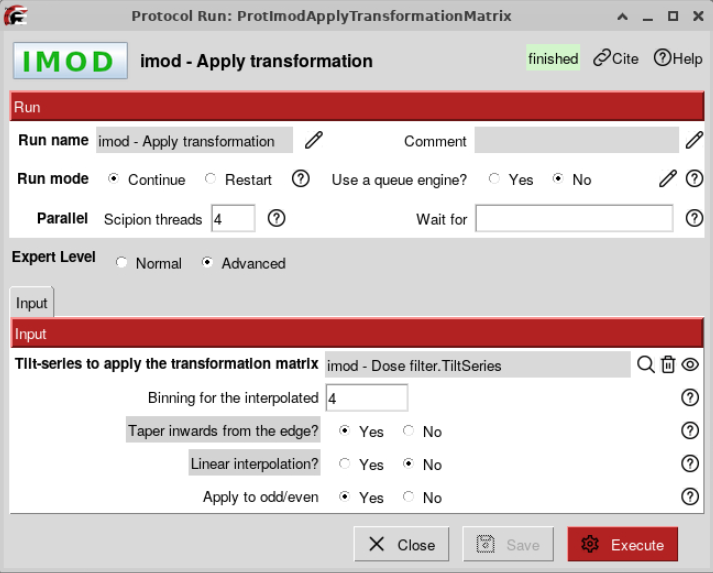
Perform dose filtering, apply transforms, then reconstruct tomograms. We opt for bin4 tomograms.
We can now finally reconstruct our tomograms

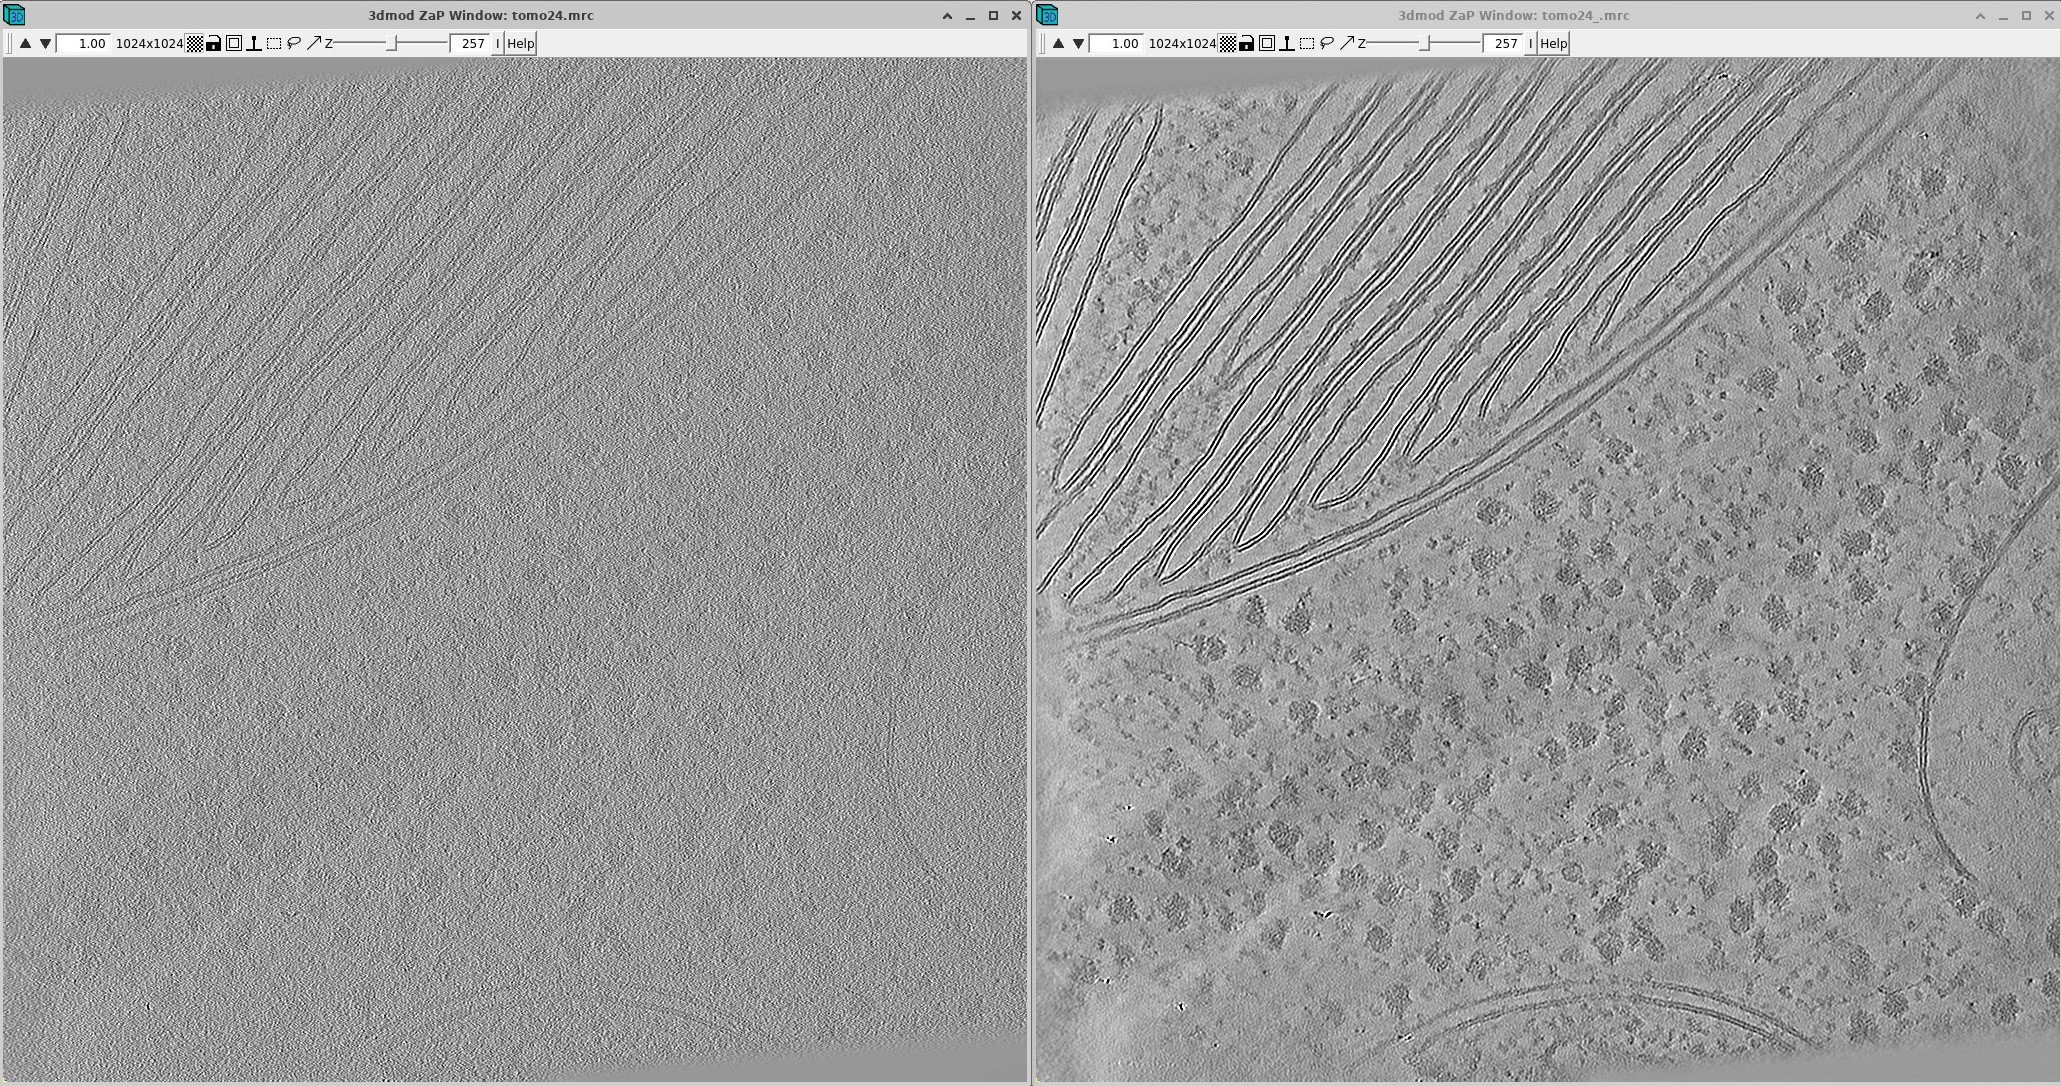
However, those tomograms don’t look particularly contrasty, right? To help make it nicer to our human eyes, we can denoise them.
Generating denoised tomograms
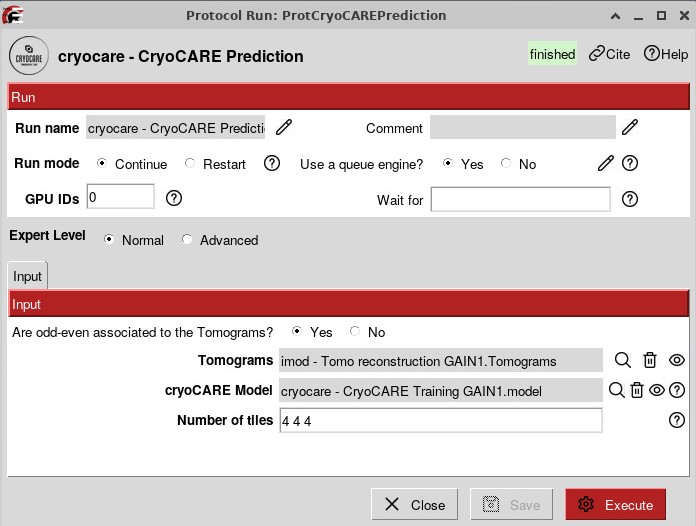
We will use CryoCARE (Content-Aware Image Restoration) – a deep learning-based denoising tool for cryo-electron tomography (cryo-ET) that utilizes a U-Net architecture. It learns from pairs of noisy tomograms (our ODD and EVN tomos) to then enhance the signal-to-noise ratio.
To run CryoCARE, you first have to train a model based on your data, which will give the best results:
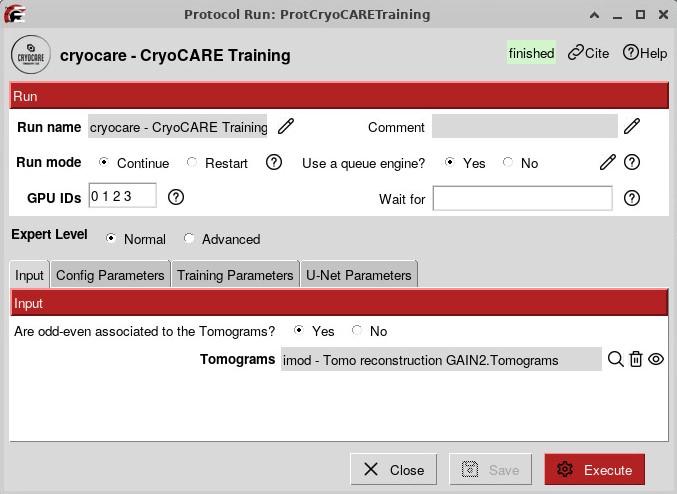
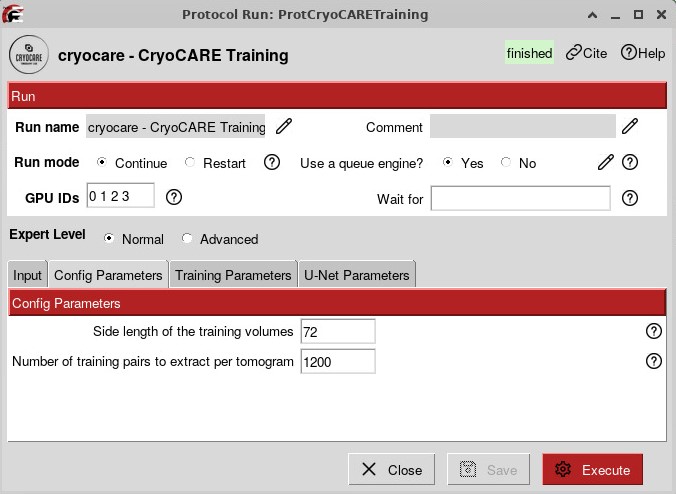
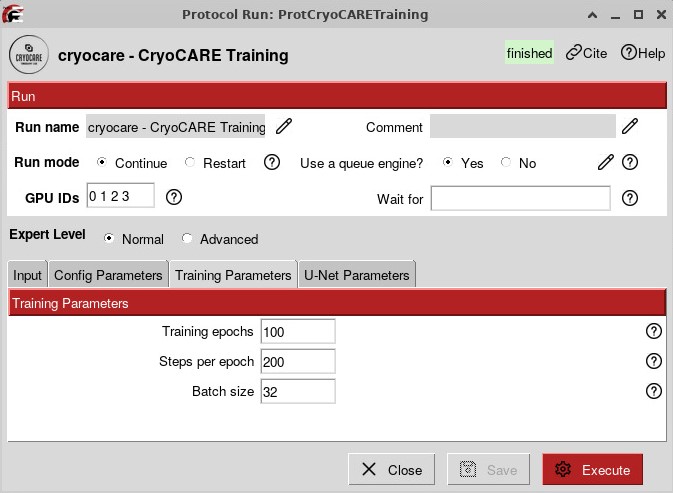
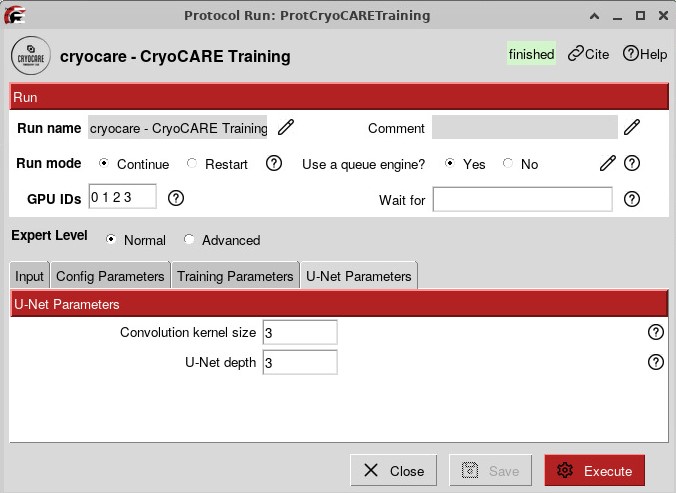
The training can run for several hours, especially if you have many tomograms. You can then run a Prediction job that will use the model that you trained and the tomograms reconstructed from IMOD.
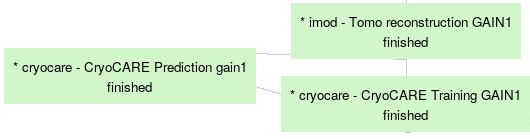
The workflow should look like that:
Here’s a comparison between non-denoised (left) and denoised (right) (yes, this is the same tomogram!). Much better, right?
A simple and rapid deconvolution approach would be the “dimifilter” - in IMOD implemented it can be run as described here
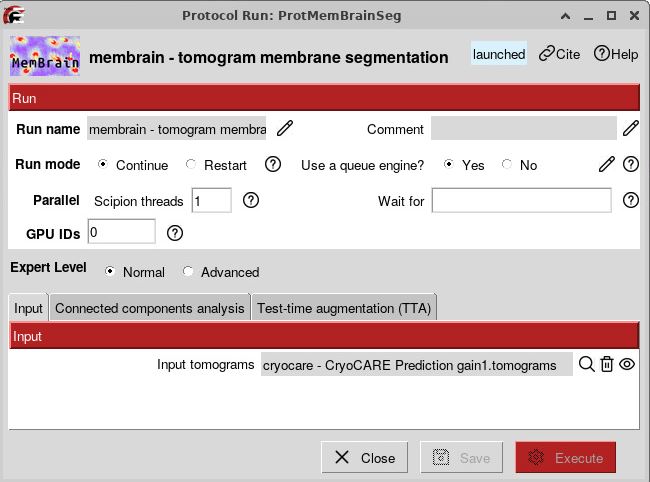
Automatic segmentation using MemBrain-seg
If you want to automatically segment membranes present in your tomograms, you can use the MemBrain-seg module (developed by Lorenz Lamm from our team). It runs well on CryoCARE tomogram. Inside Scipion just run it with default parameters:
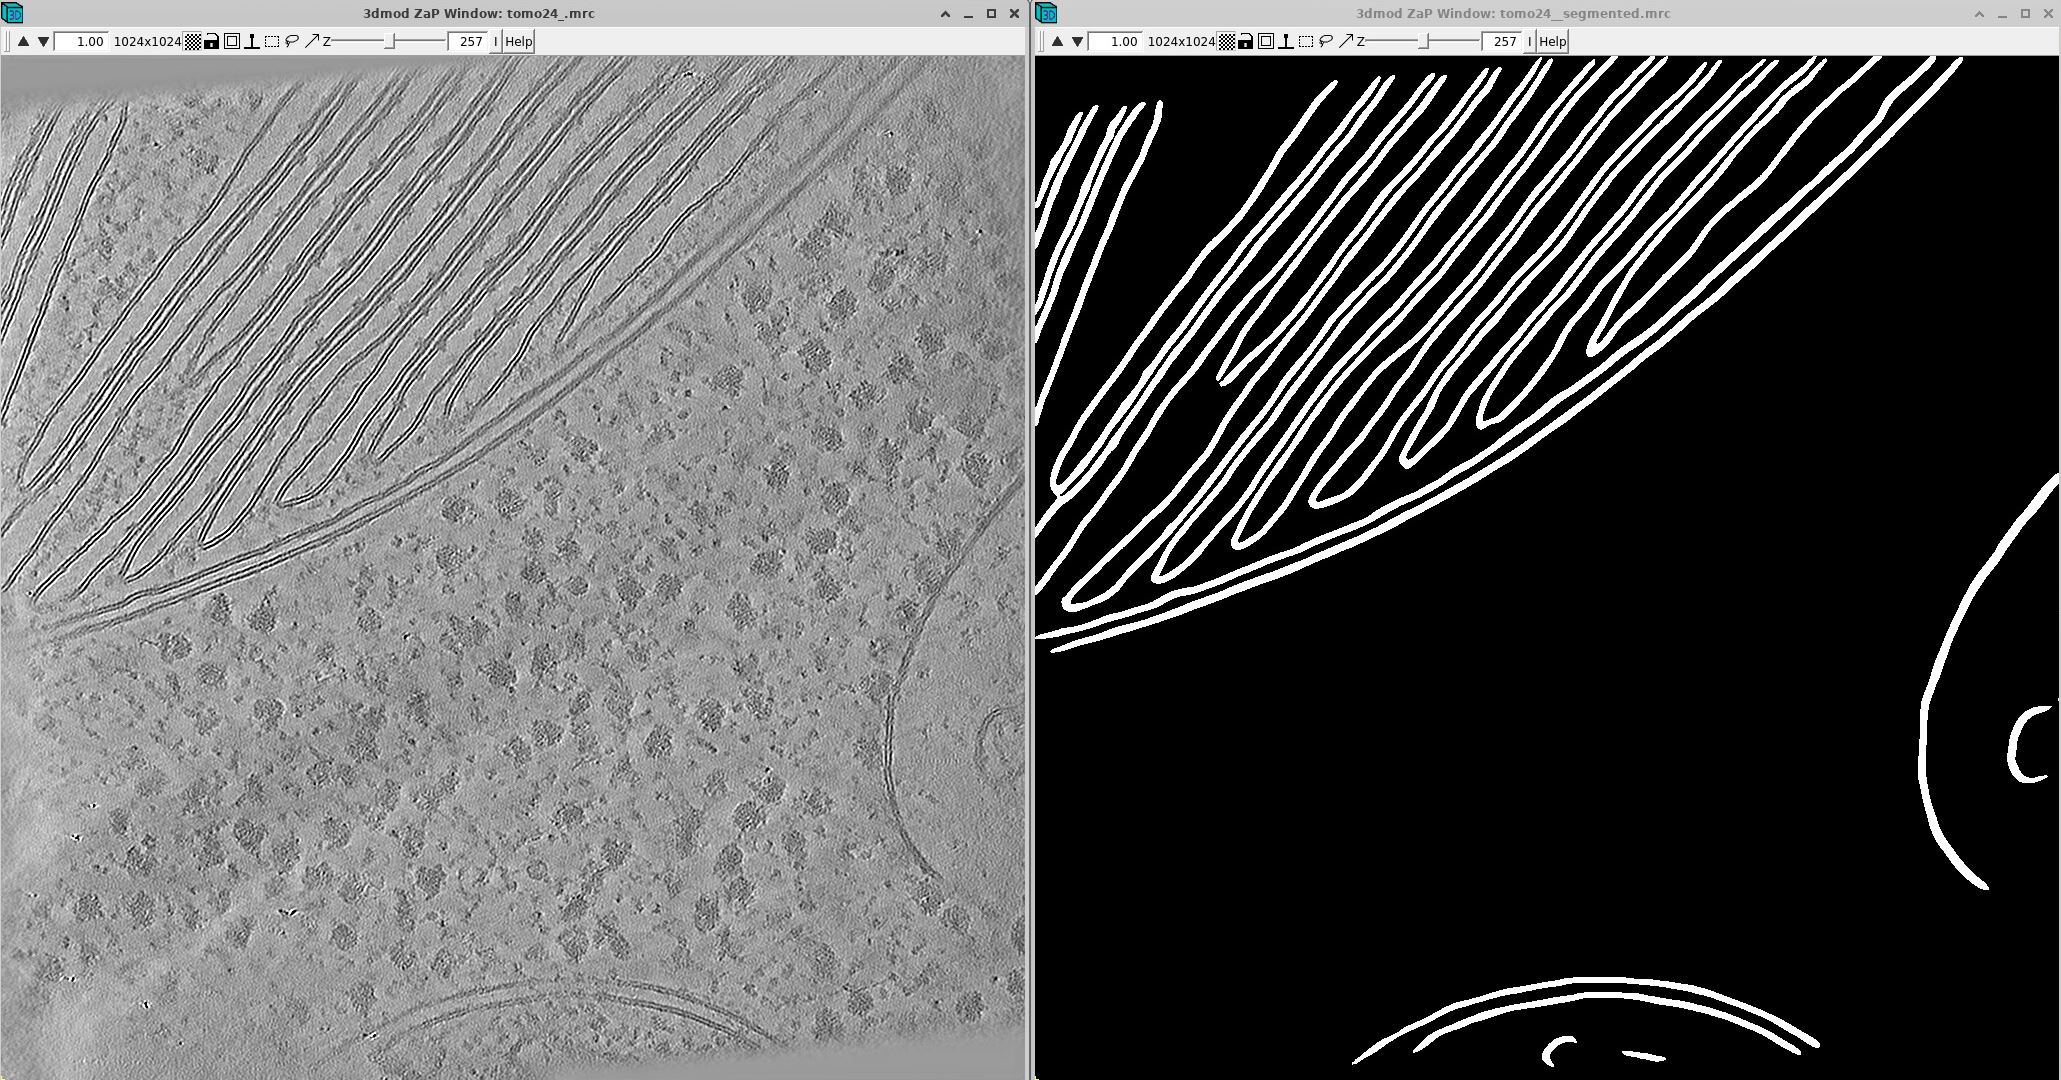
It looks great! If the segmentation is not perfect, you can then manually refine it in software such as Amira.
Exporting data to RELION5 for STA
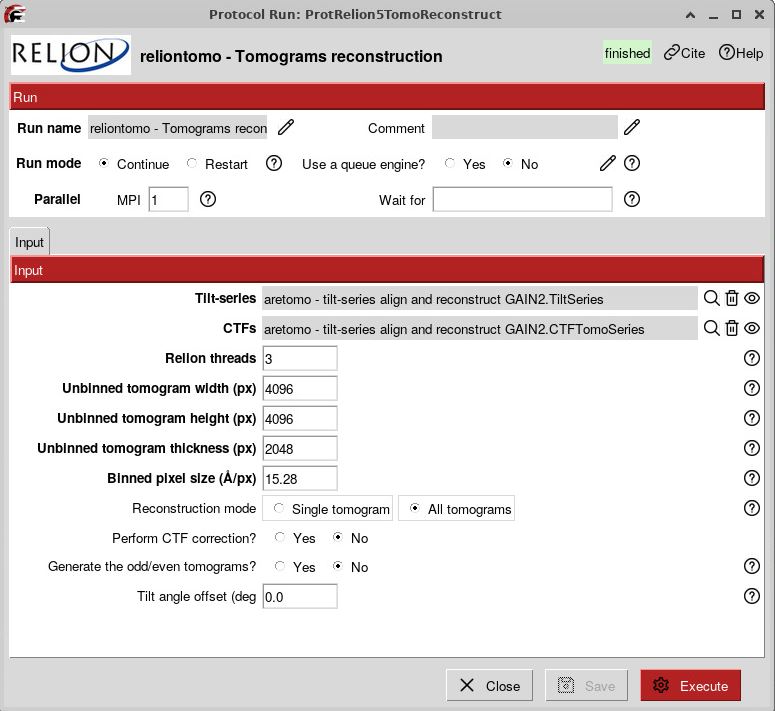
Scipion can export the final alignment, tomograms, or pick coordinates into RELION5. Just search for the reliontomo jobs.
You can run a RELION5 tomograms reconstruction using the output of AreTomo alignment, for example. Here, the parameters for tomogram reconstruction don’t really matter (because we won’t actually use the tomograms) except for the x y z (4096, 4096, 2048) that have to be consistent with the rest of your workflow. Here, we reconstruct bin8 tomograms (15.28 Å/pix) as a test:
What we really want from this job are the .star files generated that will allow us to go into RELION5.
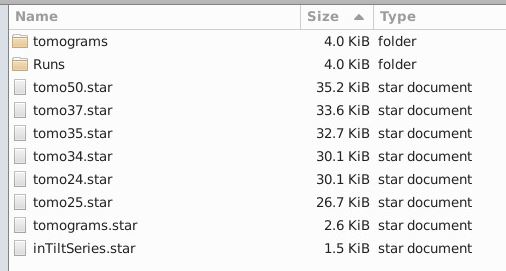
If you go through the folder where you run your Scipion projects, you will be able to find the Relion5TomoReconstruct folders:
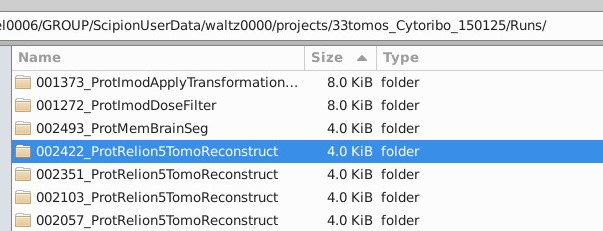
In “extra” you will see the tomoXX.star files that defines for RELION5 how each tomograms have to be reconstructed and the tomograms.star file that points to all the tomoXX.star files.
In a new folder, where you will work with RELION5, you can create a softlink to these folder(s), like so:
ln -s ~/Location/of/your/00XXXX_ProtRelion5TomoReconstruct ~/Location/of/your/Work/RelionFolder
Create a copy of the tomograms.star in your RelionFolder. It should look like that

Now, we need to make sure the tomograms.star points properly to all the tomoXX.star files. Here’s the file before
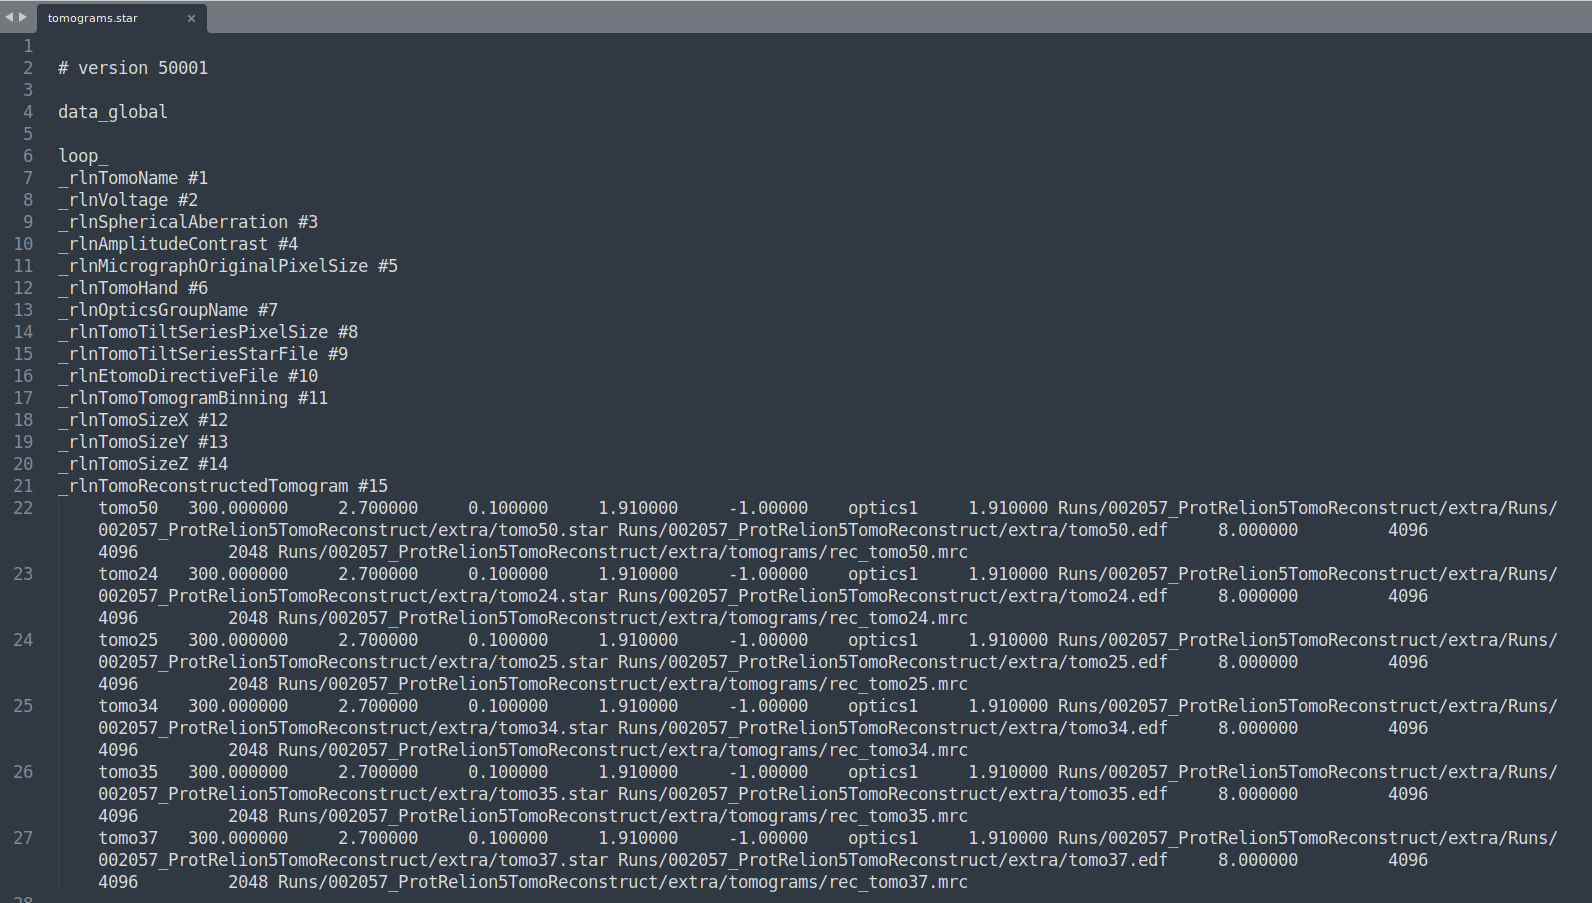
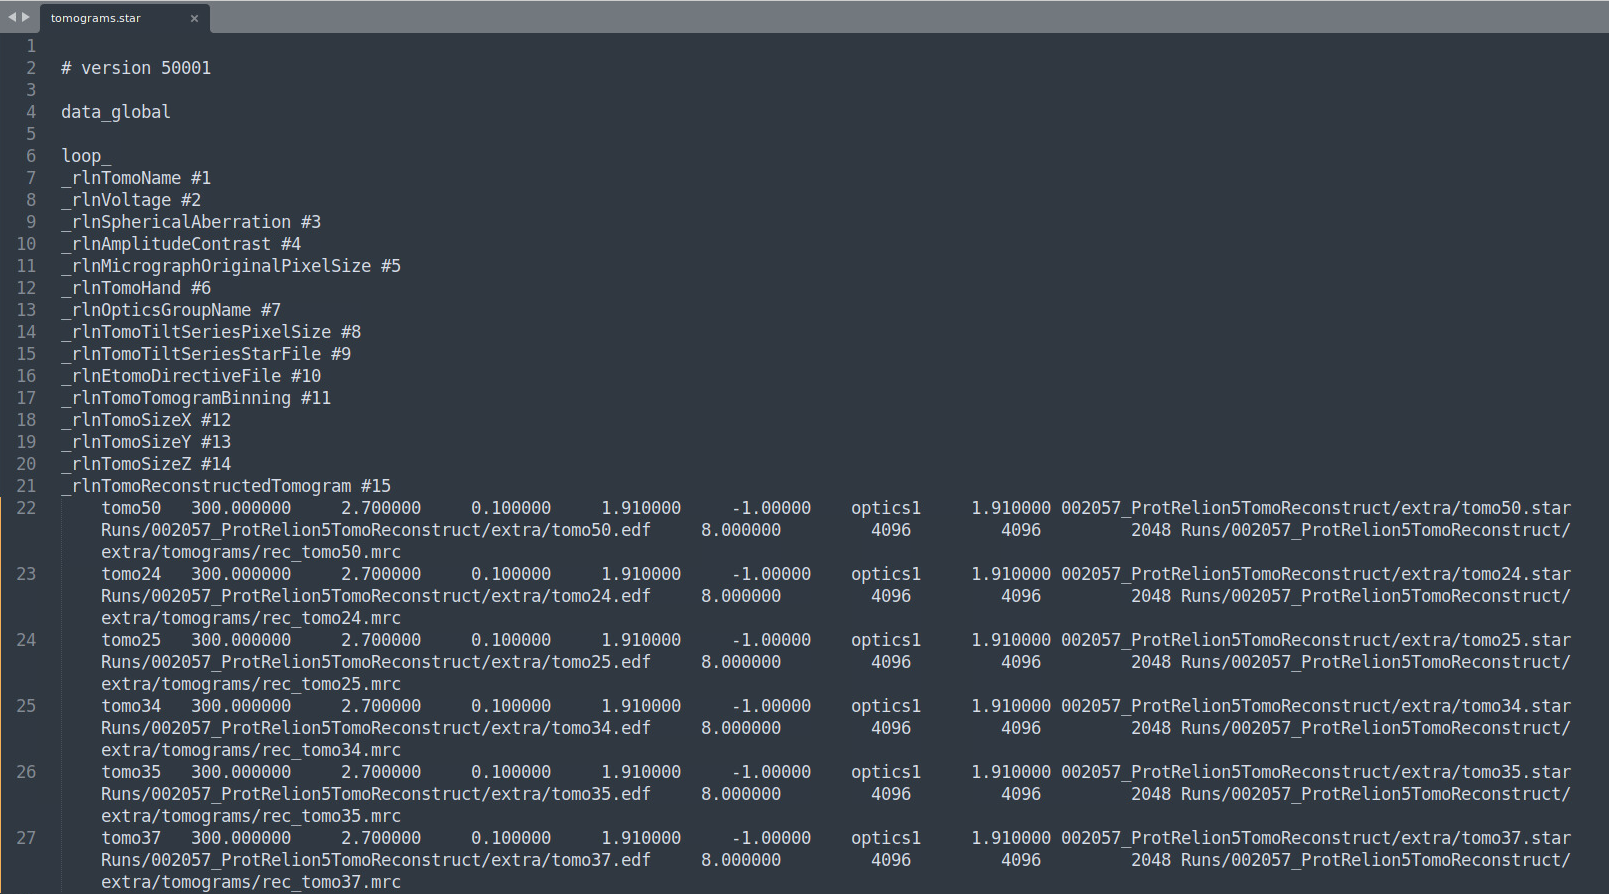
This path is wrong: Runs/002057_ProtRelion5TomoReconstruct/extra/Runs/002057_ProtRelion5TomoReconstruct/extra/tomo50.star. We want it to point to this (relative to the root of our RELION5 working folder): 002057_ProtRelion5TomoReconstruct/extra/tomo50.star. To easily modify that, you can crtl + H (search and replace) "Runs/002057_ProtRelion5TomoReconstruct/extra/Runs/" and replace it with nothing. Here’s how the file should look after:
Then we need to modify paths in all the tomoXX.star files.
To do so, you can use this script:
import os

# Define the directory containing the star files
directory = "."

# Define the text to search for and the replacement text
search_text = "Runs/"
replacement_text = "/scicore/home/engel0006/GROUP/projects/projectName/Runs/"

# Check if the directory exists
if not os.path.exists(directory):
    print(f"Error: Directory '{directory}' does not exist.")
    exit()

# Iterate over all files in the directory
for filename in os.listdir(directory):
    if filename.endswith(".star"):  # Process only .star files
        file_path = os.path.join(directory, filename)
        print(f"Processing file: {file_path}")

        try:
            # Read the file
            with open(file_path, 'r') as file:
                file_data = file.read()

            # Check if the search text exists in the file
            if search_text in file_data:
                # Replace all instances of the search text
                updated_data = file_data.replace(search_text, replacement_text)

                # Write the updated data back to the file
                with open(file_path, 'w') as file:
                    file.write(updated_data)
                print(f"Updated file: {file_path}")
            else:
                print(f"No occurrences of '{search_text}' found in {file_path}.")
        except Exception as e:
            print(f"Error processing file {file_path}: {e}")

print("Batch replacement completed.")
You need to adapt replacement_text = to your system. It needs to point to the absolute path of the Scipion /Runs/ folder. Run the script in the extra folder where you have all the tomoXX.star files. All paths should now be absolute and point to the correct files.
Now you can reconstruct tomograms in RELION5 following here where the Input tilt series is your tomogram.star file.