Preprocessing and tomogram reconstruction in RELION5
Table of Contents
- Initialise RELION
- Import frames
- Motion Correction and CTF estimation
- Cleaning the stack
- Tilt series alignment
- Tomogram reconstruction
- Refining tilt series alignment:
- Generate CTF corrected tomograms
Initialise RELION
Create a clean working folder and name it however you want.
In the folder you created, open a terminal. Load RELION5 and launch the tomo branch.
relion --tomo &
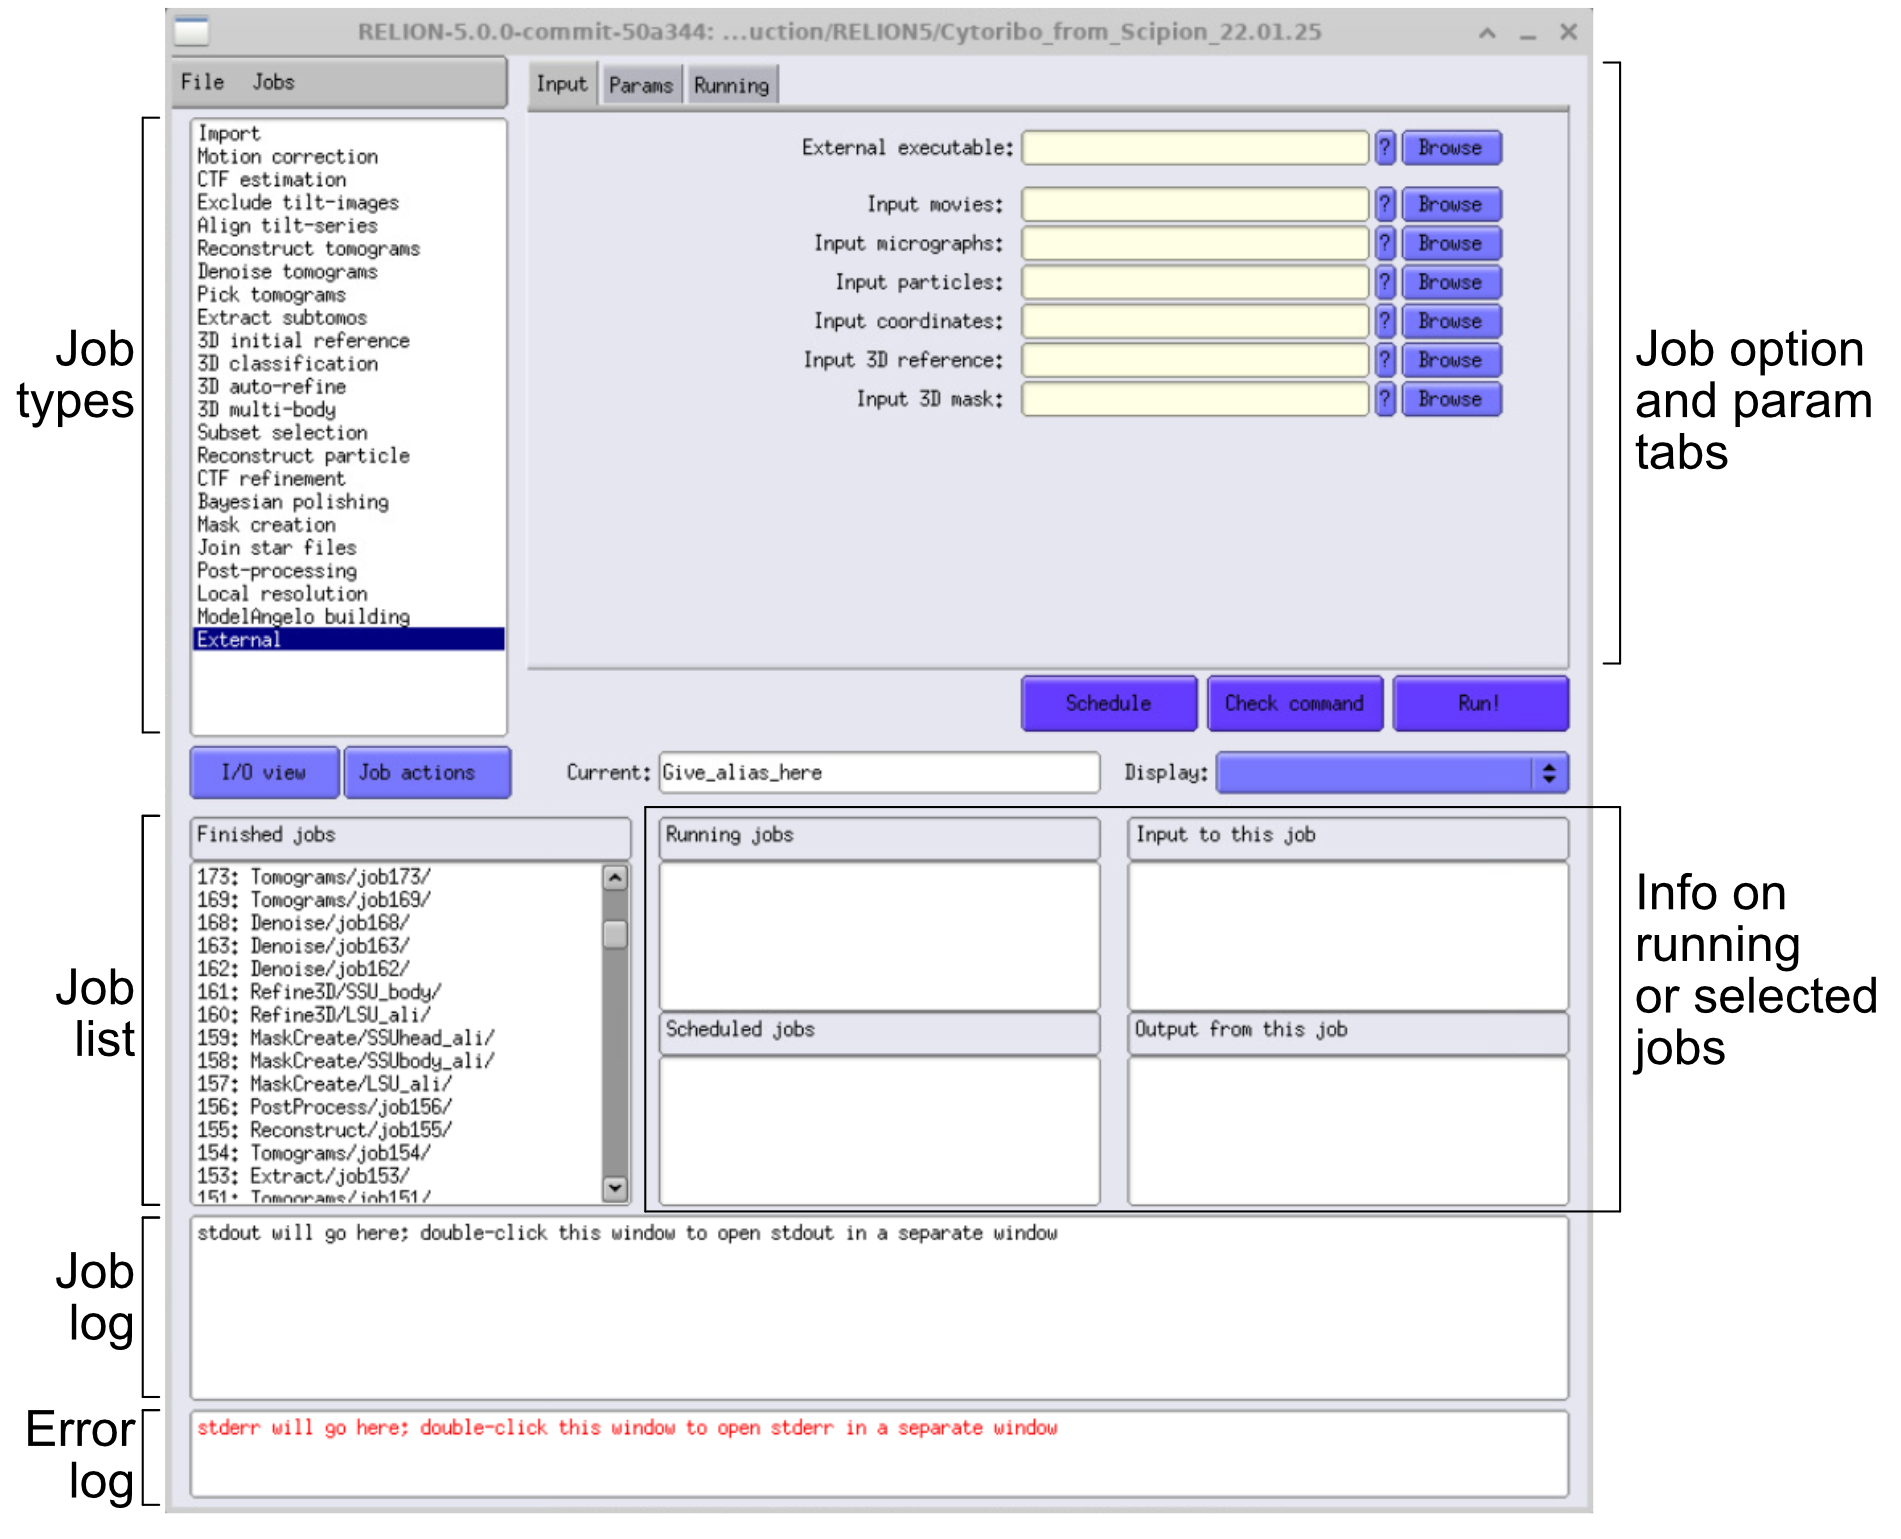
A GUI pops up, you are in RELION.
Import frames
- Create a rawdata folder in your RELION working directory.
- Copy or symlink the
.eerframes,.mdocfiles, and.gainreferences into rawdata. - Use the Import job in RELION to point to these raw frames and
.mdocfiles.
ln -s ~/path/to/frames/ ~/path/to/RELION/raw/frames

ln -s ~/path/to/gain ~/path/to/RELION/raw/gain
If you are using the test dataset, you should create soft links to the gain1_links and gain2_links folders.
Similarly to Scipion, if you are dealing with a dataset where tilt-series were collected with different Gain references, you should import them individually, grouped by gain references.
In the case of the cytoribosome dataset, out of the 33 tomos, 6 tomos were collected with one gainref and 27 with another, so we split them in two different groups. You would have to run them as separate jobs until you go to STA.
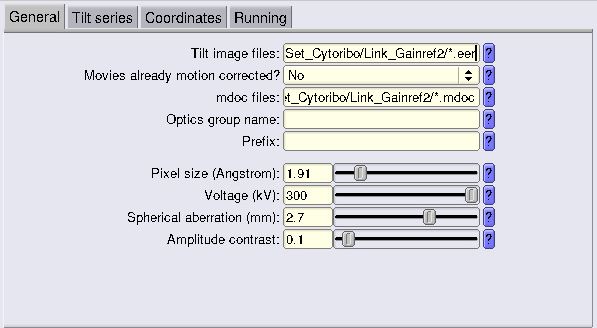
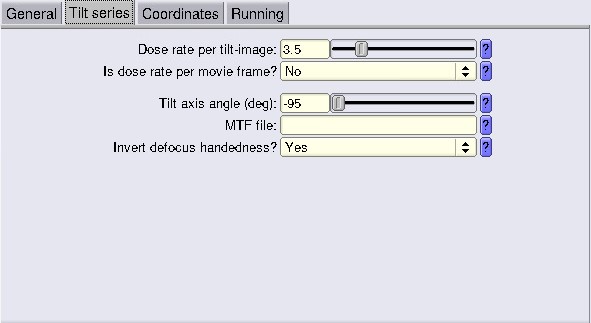
You need to know the tilt axis and the defocus handedness for RELION (something Scipion didn’t ask you for!). If you get the defocus handedness wrong, this will only have an effect during STA, especially when reaching high resolution. If you want to check it, you can use Defocusgrad. With this dataset, Invert defocus handedness should be set as YES (-1).
You also need to know the handedness of your tomos.
In our case, they are flipped, so to get the proper hand, we need to import them with an inverted tilt axis. Instead of 95, we use -95.
Both defocus handedness and tomo handedness can be checked once the tomograms are reconstructed, not before! If you don’t know anything about your data, start by reconstructing 2 or 3 of them and check that (here) first before trying to batch process over 100 tomos.
Be aware that even if data were collected on the same microscope, updates on the camera can result in flipped handedness. Data collected within the same session should all be the same.
Motion Correction and CTF estimation
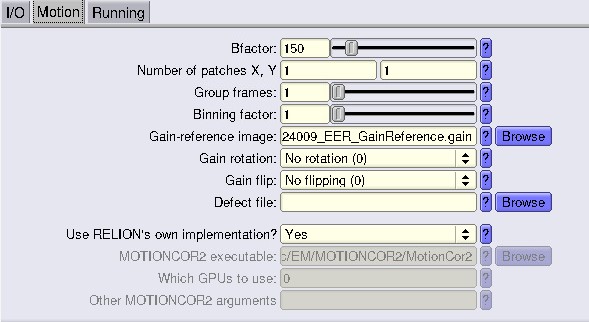
Run beam-induced motion correction using RELION’s implementation of motioncor2.
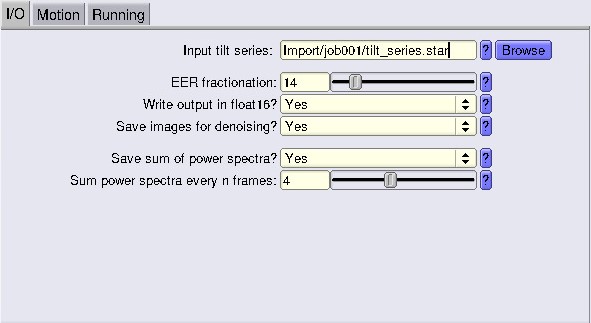
For the EER fractionation value, check this part here where we show the calculations.
At this step, you want to save the ODD and EVN frames for later steps, so tick Save images for denoising. Don’t forget to indicate the proper gainref in the Motion tab!
For CTF estimation, you can run a CTF estimation job, using the default parameters (CTFFIND-4.1 implementation). However, we recommend you estimate CTF using AreTomo (it’s the step after this one), which, in our hands, performs better.
If you still choose to CTFFIND, make sure CTF is properly estimated by checking the .pdf output (in the jobXXX directory).
Cleaning the stack
Once motioncorr is done, you might want to remove bad tilts. Bad tilts are either:
- Strongly shifted compared to the others (more than 15% of the FOV)
- Partially or fully blacked out - especially high tilts
- Blurred because motion correction was not sufficient
In our case, we remove them manually, but be aware that some software offers automated tilt curation based on the result of motion correction and the “darkness-level” of the tilts (for example, AreTomo)
Run an Exclude tit-images job using the output of MotionCorr or CTF estimation. Don’t submit to the queue.
This will open Napari (it might be slow to open). Napari is an interactive, open-source Python tool for visualising, annotating, and analysing large multi-dimensional images, designed to support scientific workflows with an extensible plugin ecosystem
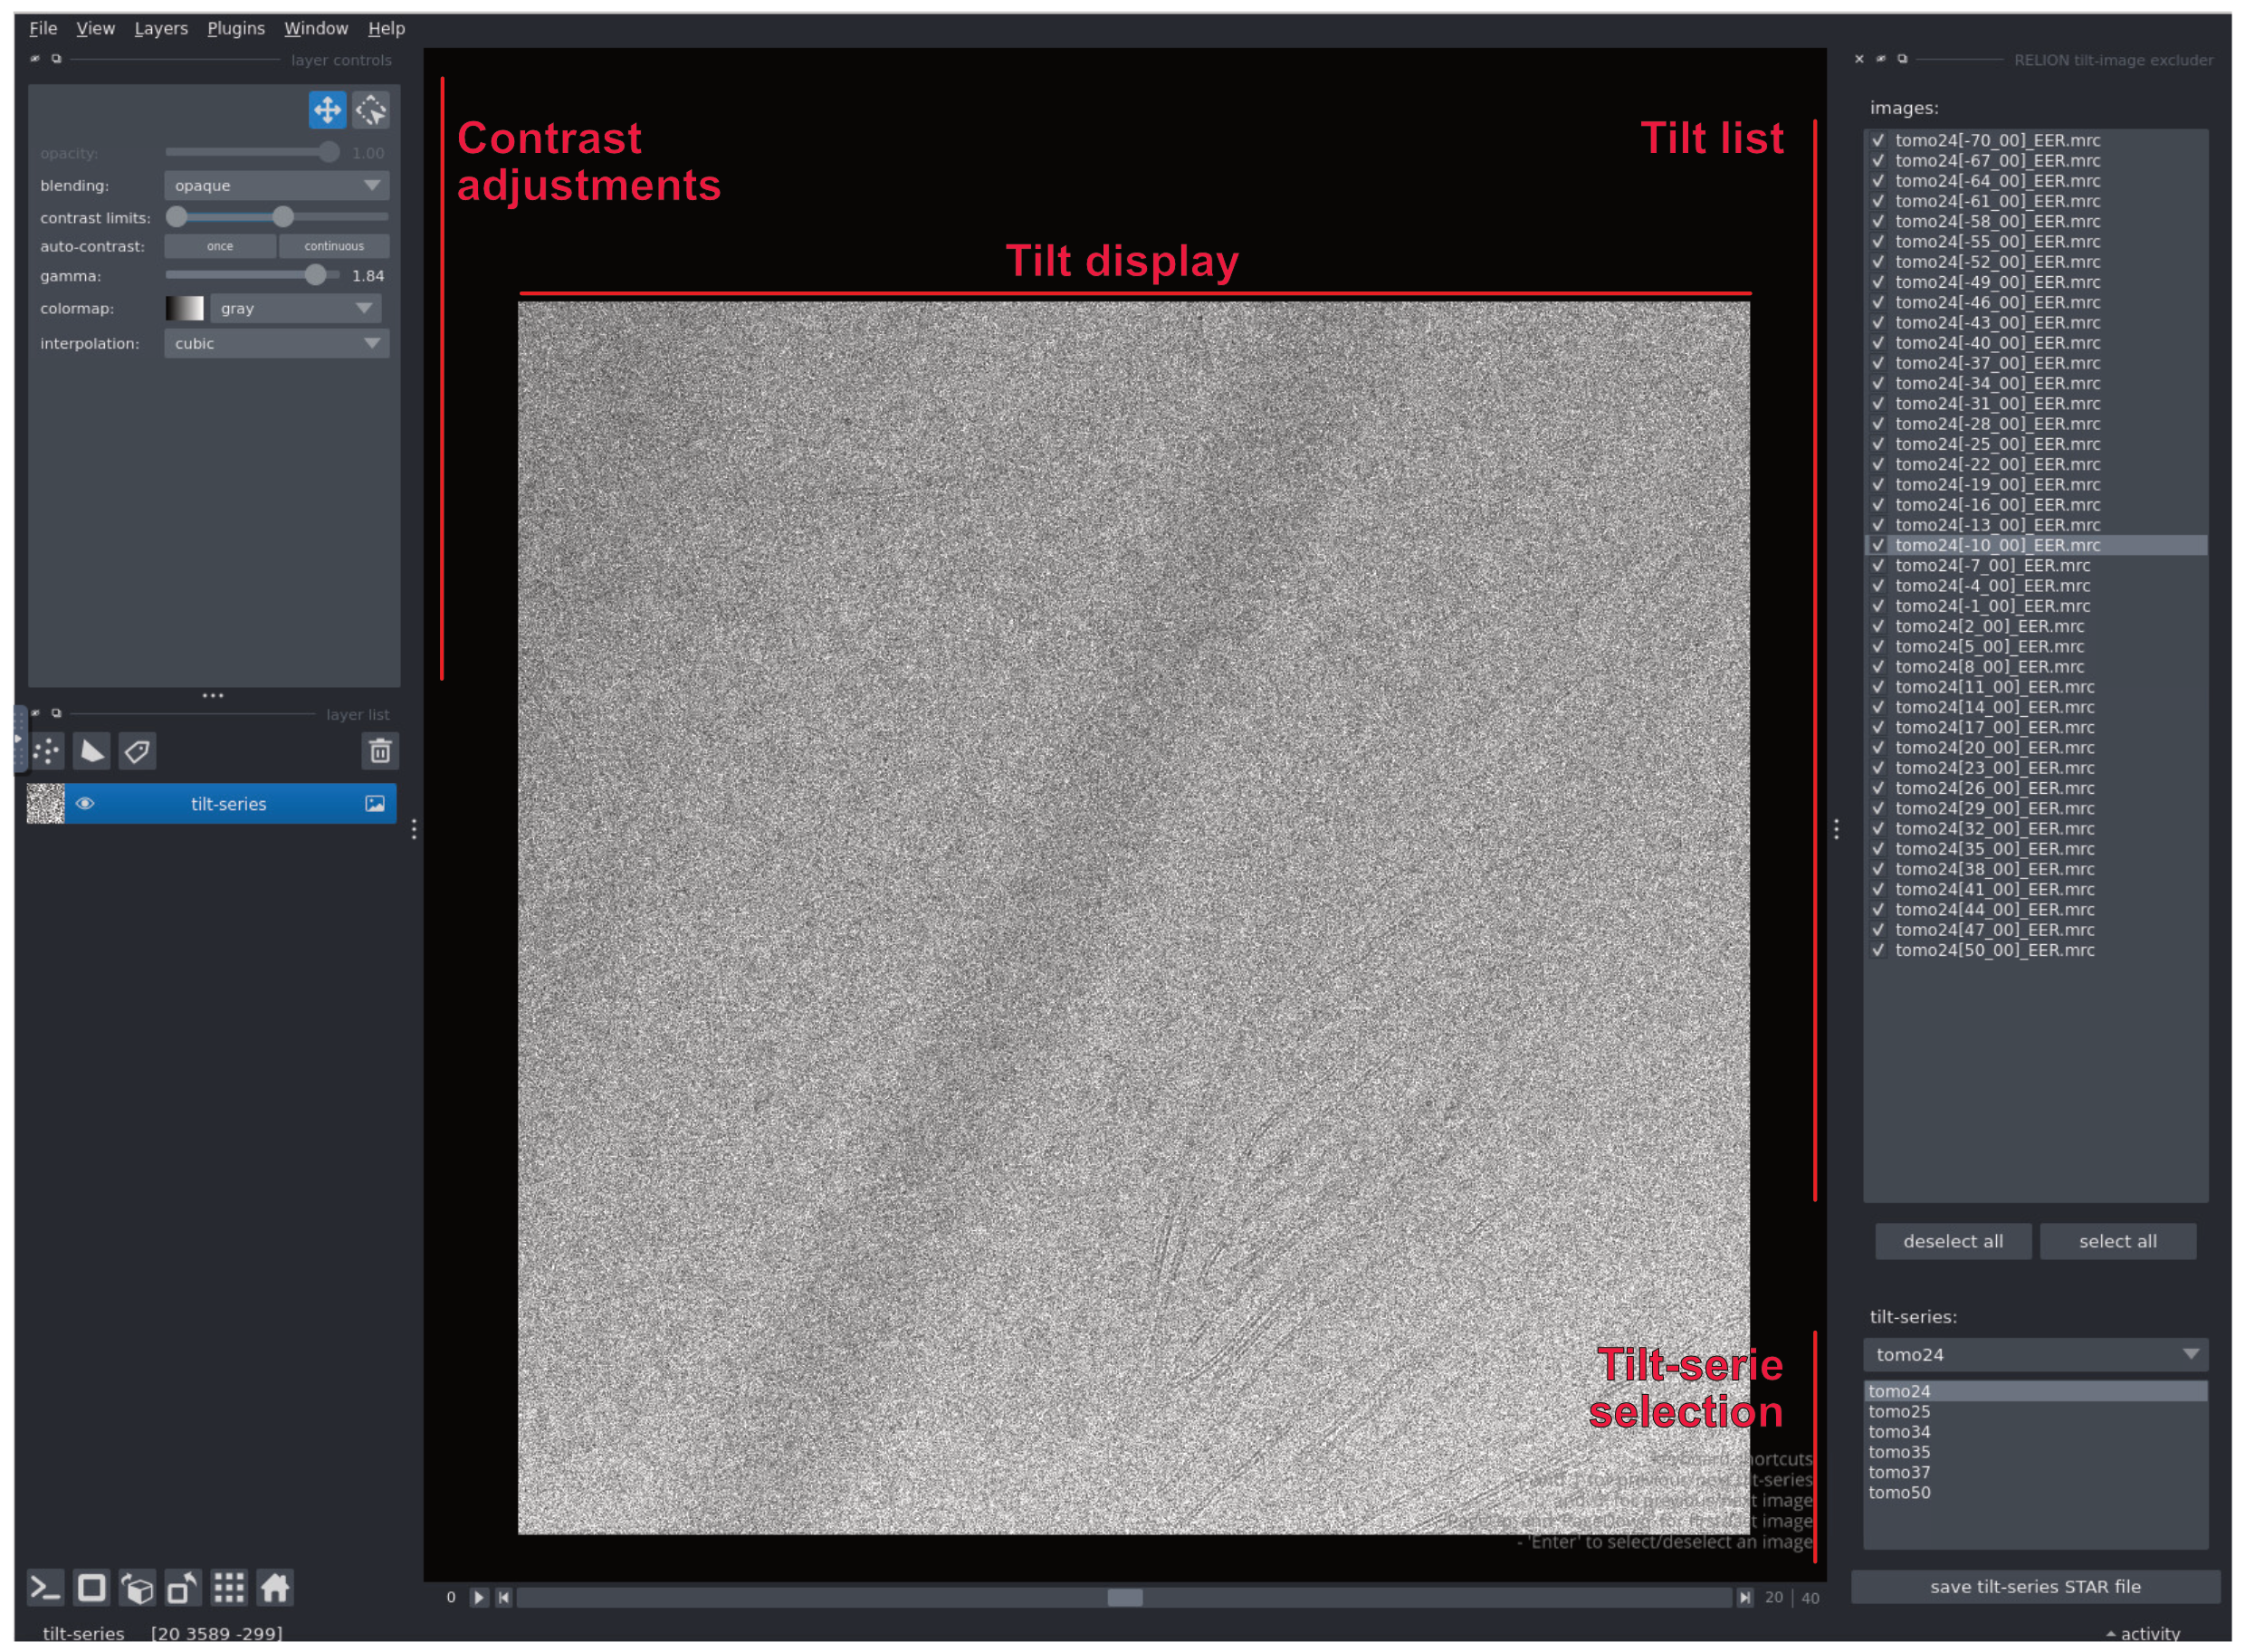
Go through the tilt stack and untick the stacks that aren’t good. In that case, for example (tomo24) tilts -67° to -70° and 41° to 50° were blacked out, so we removed them. Be aware that Napari does not handle the contrast of tomograms that well…
Once you are done with all the tilt series, you can press save tilt-series STAR file and proceed to the next step.
Tilt series alignment
Getting a properly aligned tilt series is very important for efficient particle detection and for tomogram “good-looking-ness”.
Similar to Scipion, in RELION, you can either do it using AreTomo or the more manual way with IMOD patch tracking.
For this dataset, and in general, AreTomo works great. This is why we are going to show you how to automatically do it with AreTomo.
AreTomo tries to find the optimal back projection scheme based on a theoretical lamella thickness. It will also find and refine the tilt axis angle, starting from the one you provided at the import step.
The way AreTomo works right now in RELION5 is a bit restrictive. In the GUI, you can only set a single estimated tomogram thickness. AreTomo performs best when the tomogram thickness is accurate, so having one value for all tomos is not optimal (we will optimise this in a second).
Make sure the path to the AreTomo2 executable is correct and points to your system.
Here, let’s run a first alignment with a value of 200 nm. Set Correct Tilt Angle Offset to YES. Also, this is where we are going to use AreTomo for CTF estimation.
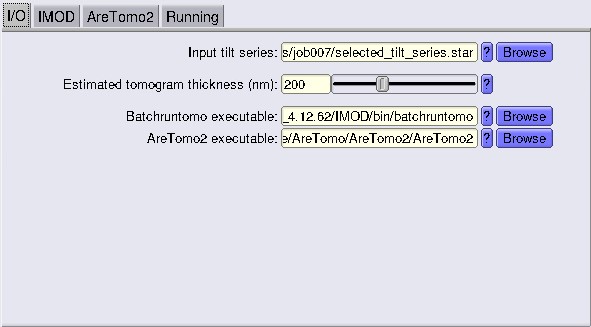

Run the job.
Tomogram reconstruction
We are now going to quickly reconstruct bin8 tomograms.
To do so, let’s launch a Reconstruct tomograms job.
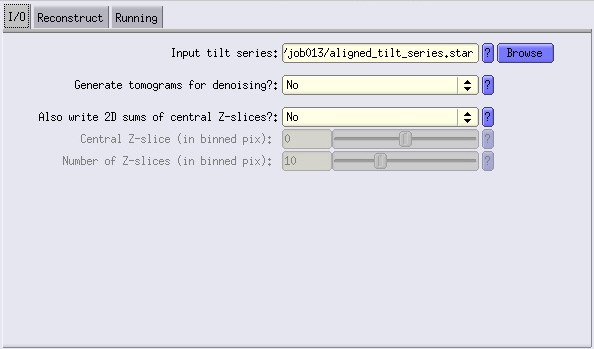
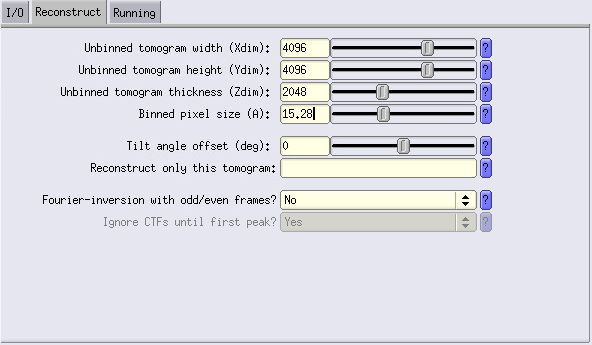
In I/O fill the info as shown, and go to the Reconstruct tab.
Fill in the info about your tomogram dimensions, here 4096 4096 2048 (bin1 dimensions). For the pixel size, we will bin by 8, so we use a value of 15.28 Å/px.
Run the job. You now have bin8 tomograms.
Refining tilt series alignment:
Similar to Scipion, you can measure the tomogram thickness for each tomogram and use this value to have a more accurate tilt series alignment. If you follow the Tutorial using Gain1 or Gain2 from the Chlamy dataset you can download the measured tomogram thickness files here. If not you can refine tilt series alignment by measuring the tomogram thickness as follows:
To do this, you can measure in IMOD by hand.
- Open the bin8 tomograms that resulted from your first AreTomo run.
- Go to Edit > Image > Flip/Rotate.
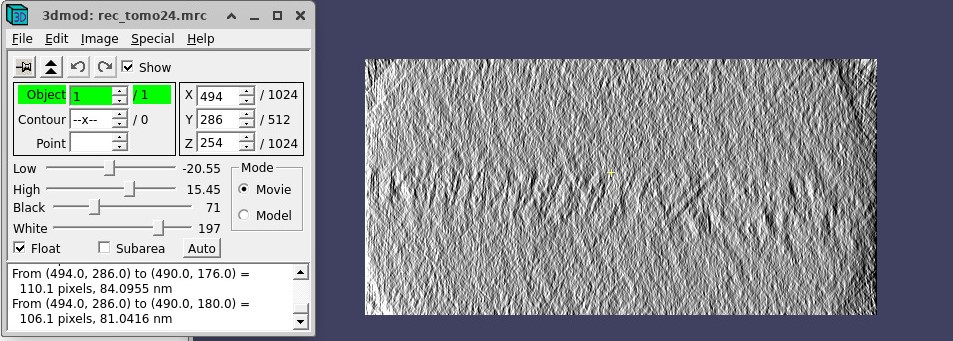
- Measure the lamella thickness:
- Place the yellow cross on one lamella edge by left-clicking (or right or middle)
- Move your cursor to the opposite edge of the lamella (DON’T CLICK).
- Press Q to get the distance between the yellow cross and the position of your cursor.
The distance will appear in the dialogue box. Here 106 pixels, 81 nm.
Then, you need to edit selected_tilt_series.star file in the ExcludeTiltImages job, and add a column named _rlnTomoTomogramThickness #9. The column is thickness in nm.
Here’s an example of an edited file:
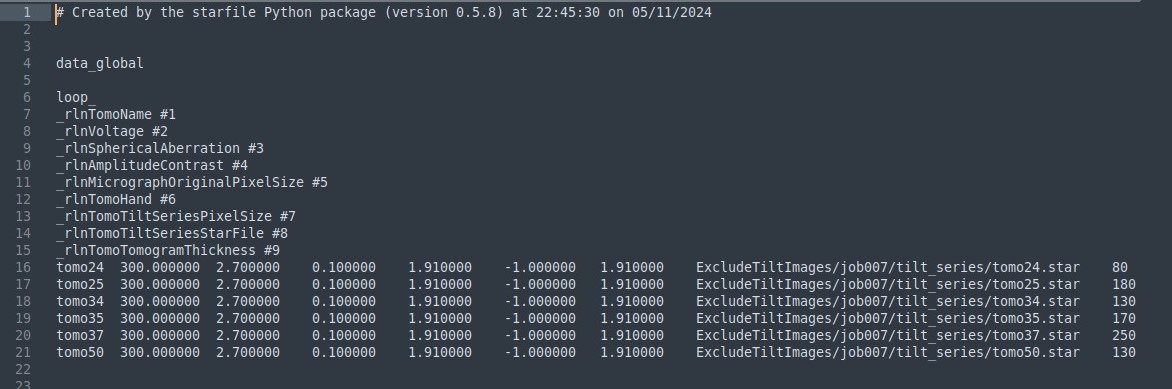
Whenever you modify a file, create a copy of the original and name it *_ori, so that you keep track of what you have done and can easily revert.
Then run the AreTomo job again with the edited selected_tilt_series.star and run the tomo reconstruction. Your tomo should look better.
To be sure it was taken into account, check the .log and AlignZ should be different for all tomos.
Generate CTF corrected tomograms
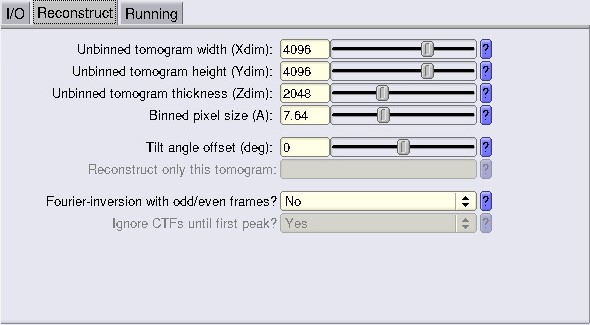
Once we are satisfied with the alignment of our tomograms, we can reconstruct bin4 CTF corrected tomograms for template matching.
Tilt angle offset: If you reconstructed with AreTomo, you don’t need to use this because AreTomo automatically flattens the tomo.

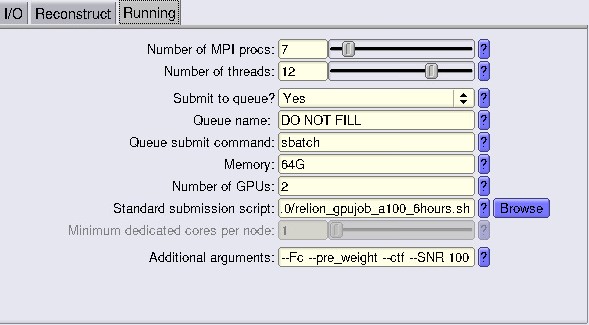
Additional flags to make your tomo look nicer, and we advise using:
- –Fc (binning by Fourier cropping)
- –pre_weight (pre-weighting in 2D instead of 3D weighting)
- –ctf (CTF correction by phase flip)
- –SNR 100 (Wiener filter SNR value. Default 10. We found 100 looks “more IMOD-like”)
From here on you can run template matching to get particle positions (+ angles) to then try STA
We advise to always CTF correct tomograms especially for template matching and STA. Even denoising like cryoCARE and DeepDeWedge for example can benefit from this extra information of frequencies.